Fashion flats and Canvas Explorer
A fashion flat is a technical drawing of a garment as if it were laid flat — front, back, and any construction details that matter. Drawn to proportion (not to scale), in clean line work, showing seams, stitching, closures, pockets, and trims. It's the visual half of the Tech Pack: General Comments tells the team what you want, the fashion flat shows it.
A good flat earns its keep three times over:
- The pattern room reads it alongside General Comments to draft the pattern.
- The sample and production rooms work from it to know where seams and details land.
- QC uses it as the reference image for defect heatmaps — every spot on a garment maps back to a location on this drawing.
You can attach a fashion flat to a Tech Pack two ways: upload one you already have, or draw it in Canvas Explorer, our built-in vector tool.
Opening Canvas Explorer
Save the Tech Pack first — Canvas Explorer attaches its output to an existing record. Then either:
- Click Open Canvas Explorer on the Design tab, or
- Press
Cmd+Shift+Oon Mac,Ctrl+Shift+Oon Windows.
A picker opens listing any vectors already attached to this Tech Pack. Pick one to keep editing, or Start blank to begin a new drawing.
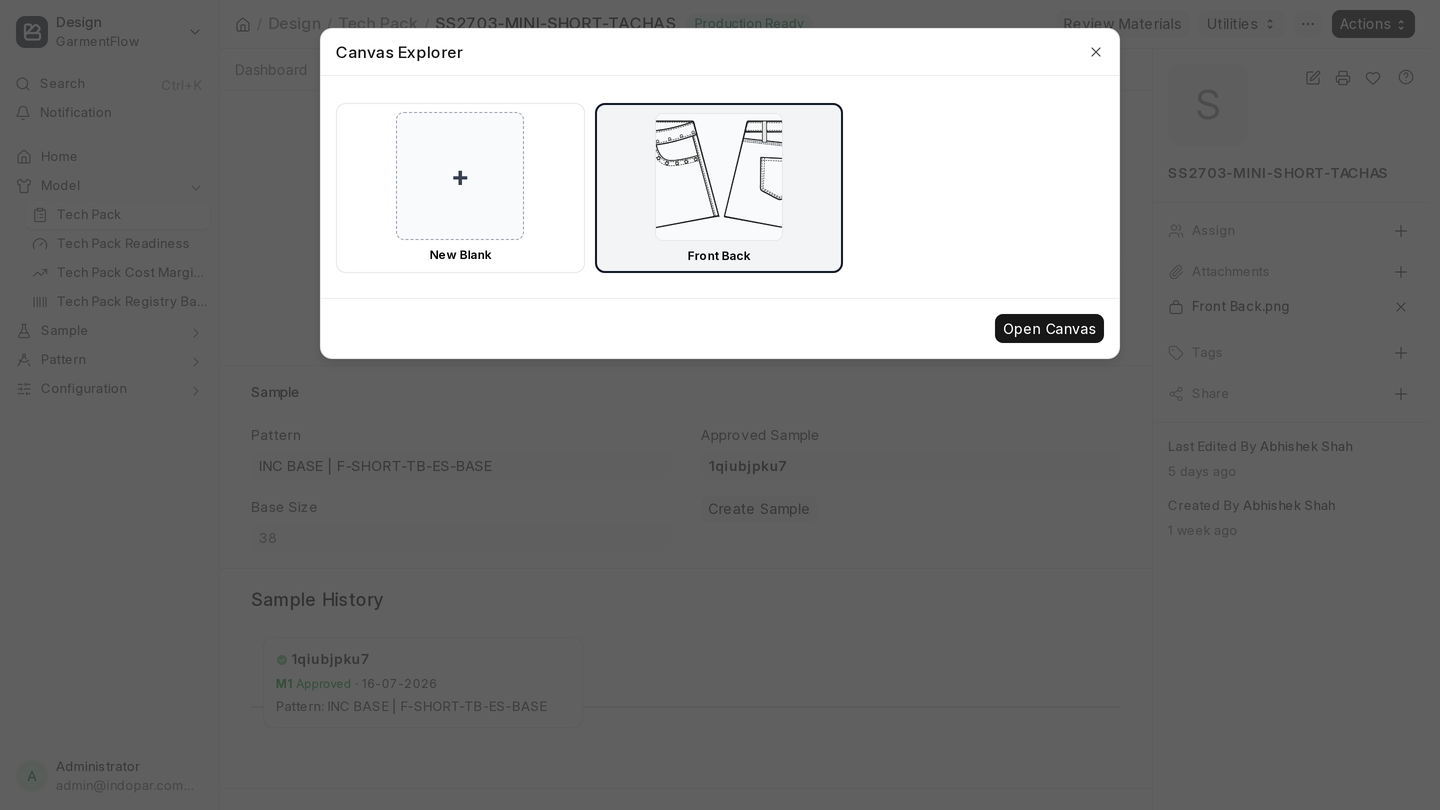
Canvas Explorer window
Canvas Explorer opens as a modal on top of the Tech Pack. The header has three things you'll use:
- The file name on the left. Click it to rename the drawing.
- Save on the right. Commits the current state of the canvas to a Canvas File attached to this Tech Pack and updates the Fashion Flat field.
- Close on the right. Closes the modal. The Tech Pack form reloads underneath, so any saved changes show up immediately on the Fashion Flat field.
Everything else is the drawing surface — an infinite canvas. Pan with the trackpad, zoom with the scroll wheel, and use the tools to draw.
Drawing the flat
The tools cover the usual primitives:
- Pen for freehand — necklines, seam shaping, drape, anything organic.
- Shapes — rectangles, ellipses, lines, arrows — for blocks, panels, and structured construction.
- Text for labels — pocket dimensions, stitch type, callouts that point to specific construction notes.
- Selection to grab one or more shapes and move, resize, recolor, or duplicate them as a unit.
Standard keyboard moves apply: Cmd/Ctrl+Z to undo, Cmd/Ctrl+D to duplicate, and zoom-to-fit when the drawing has drifted off-screen.
A flat that the rest of the factory can actually use
A few habits make the difference between a flat someone can build from and one they have to interpret:
- Draw the back. Front-only flats hide half the construction. Include a back view at minimum, and a side or detail view if anything non-obvious is going on.
- Vary line weight. Thicker lines for outer seams, medium for construction seams, thin or dashed for topstitching. The factory reads weight before it reads labels.
- Label what isn't drawable. Wash codes, fabric weight, stitching color — anything that can't be inferred from line work alone. Use the text tool.
- Stay in proportion. Fashion flats don't need to be to scale, but front and back should look like the same garment.
Saving and revising
Hit Save in the header to commit. The drawing is stored as a Canvas File on this Tech Pack, and the Fashion Flat field updates to point at it. Close the modal and you'll see the new flat on the Design tab.
There's no auto-save — if you close without saving, the unsaved work is gone. To revise a flat later, open Canvas Explorer through the picker and select the existing vector; your work picks up where you left off.
What to do next
With the flat attached, return to the Design tab and either link an existing Pattern or use Create PMR to brief the pattern room.